Tutorial: Grafting (Kitchener stitch)
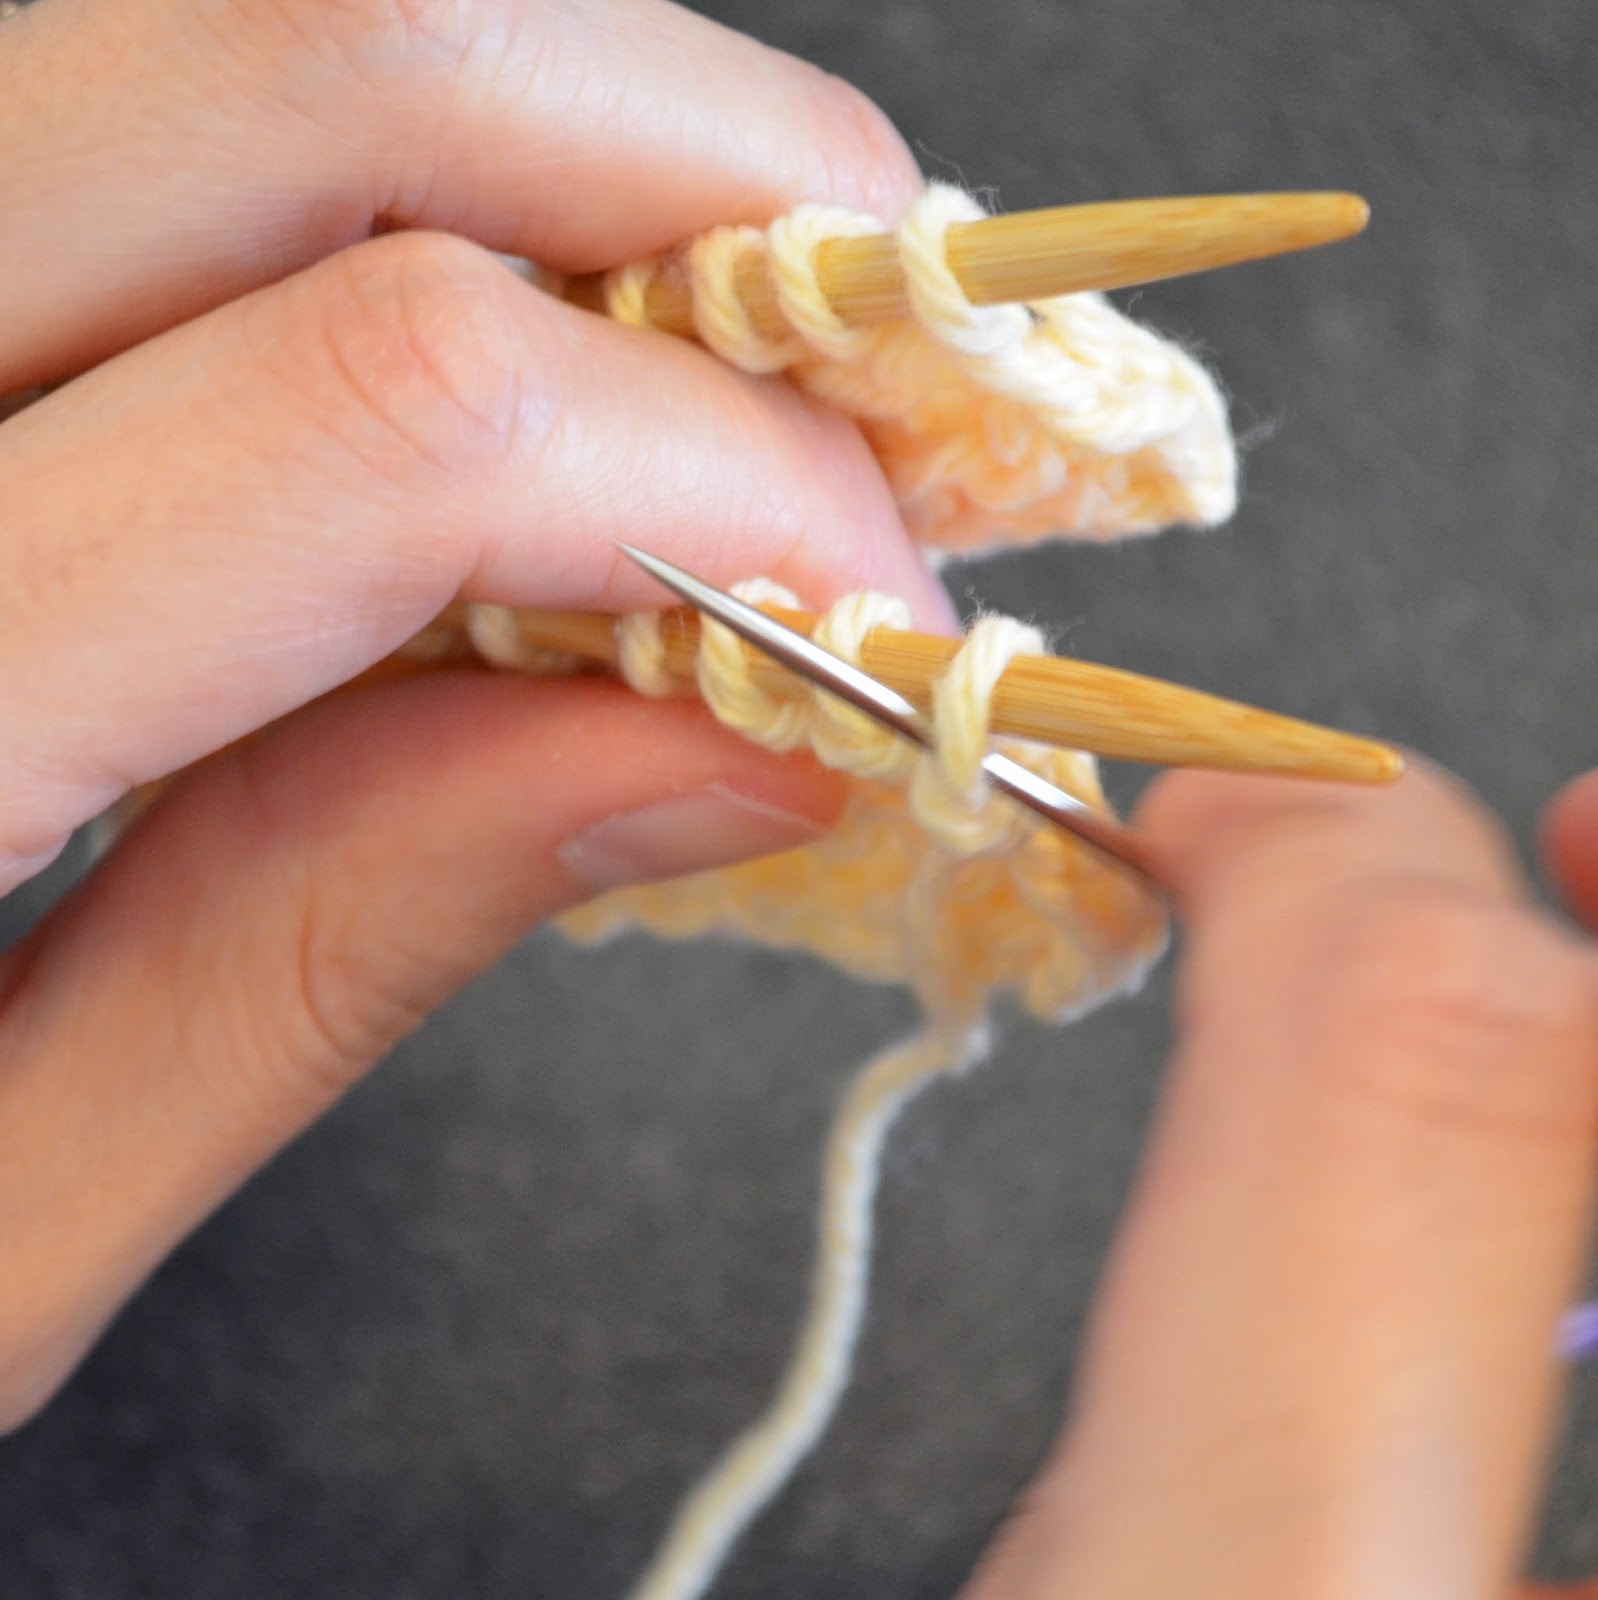
Arrange stitches on two needles so that there is the same number of stitches on each needle. Hold the needles parallel to each other with wrong sides of the knitting facing away from you (unless otherwise instructed). Allowing a yarn in the darning needle to be about four times longer than the width of the grafting area, thread matching yarn on a darning needle. Work from right to left as follows:
Step 1. Bring darning needle through the first stitch on the front needle as if to purl and leave the stitch on the needle (Figure 1).
Step 2. Bring darning needle through the first stitch on the back needle as if to knit and leave that stitch on the needle (Figure 2).

Step 3. Bring darning needle through the first front stitch as if to knit and slip this stitch off the needle, then bring darning needle through the next front stitch as if to purl and leave this stitch on the needle (Figure 3).

Step 4. Bring darning needle through the first back stitch as if to purl and slip this stitch off the needle, then bring darning needle through the next back stitch as if to knit and leave this stitch on the needle (Figure 4).

Repeat Steps 3 and 4 until one stitch remains on each needle, adjusting the tension to match the rest of the knitting as you go. To finish, bring darning needle through the front stitch as if to knit and slip this stitch off the needle, then bring darning needle through the back stitch as if to purl and slip this stitch off the needle.
For more information about grafting I highly recommend this indispensable free online mini-class with clear and thorough instructions made by Anne Hanson on Craftsy: The Ins & Outs of Grafting.
Step 1. Bring darning needle through the first stitch on the front needle as if to purl and leave the stitch on the needle (Figure 1).
Figure 1
Step 2. Bring darning needle through the first stitch on the back needle as if to knit and leave that stitch on the needle (Figure 2).
Figure 2
Step 3. Bring darning needle through the first front stitch as if to knit and slip this stitch off the needle, then bring darning needle through the next front stitch as if to purl and leave this stitch on the needle (Figure 3).
Figure 3
Step 4. Bring darning needle through the first back stitch as if to purl and slip this stitch off the needle, then bring darning needle through the next back stitch as if to knit and leave this stitch on the needle (Figure 4).
Figure 4
Repeat Steps 3 and 4 until one stitch remains on each needle, adjusting the tension to match the rest of the knitting as you go. To finish, bring darning needle through the front stitch as if to knit and slip this stitch off the needle, then bring darning needle through the back stitch as if to purl and slip this stitch off the needle.
For more information about grafting I highly recommend this indispensable free online mini-class with clear and thorough instructions made by Anne Hanson on Craftsy: The Ins & Outs of Grafting.

Comments
Post a Comment